Tatting!

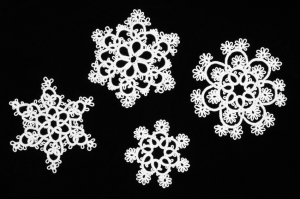
No not as in needle applied to flesh but as in ancient needle craft done for centuries in various countries of the world!  Are you like me always looking for ways to use up that old scrap yarn?  Well here is a good project for you.  It looks a lot harder than it is.  All the tutorials for this are done with a really fine chord so using a thinner yarn is WAY easier and FASTER!  I was inspired by seeing all this amazing needle work that the ladies do here.  Unfortunatly it seems not to be being passed down to the younger generations. It used to be tradition that the girls once they got engaged started working furiously on tatted doilies for the new husbands family as gifts.  Even though they are fast it easily takes hours just for one finely stitched doily.

So recently I had heard about another missionary here in Peja who had started a little buisness with some ladies selling their “crochet” product.  So I was looking around http://www.etsy.com looking for some items that the ladies could imitate as far as wearable stuff and decided to try a go at it my self.  This was the end result.  The grey bracelet was from me messing up on a flower design and just kinda having a free for all.  Mistakes in my case usually end up better than intentional stuff 🙂

Materials:

  • Thin yarn
  • Long (big eyed) needle

When I get back in the states I will have some of these items for sale as well as some other earrings and necklaces made by the ladies group in Peja.

Here are the tutorials that I watched by “agasunset” from youtube.  I just used a really big needle and thinnish yarn since that is what I had.  The ladies here use these tiny crochet hooks and many videos I saw used the shuttels.  I like the needle, very easy in my opinion.

Basic double stitch

Picot stitch

Closing a ring
Flower
Thanks agasunset for the great tutorials..to visit her shop on etsy go here
Published in: on April 4, 2010 at 7:49 pm  Comments (4)  

Paper Mache Bowls

So I have a jr high girls group that I meet with to study the Bible and we have been doing crafts that have to do with our lesson.  We are learning what it is to be a daughter of the King (a princess).  The last two weeks we learned that as Princesses we have a purpose and that we are individually beautiful creations of God.  The we were studying was Ephesians 2:10  “For we are his workmanship (masterpiece), created in Christ Jesus unto good works, which God hath before ordained that we should walk in them.”   So I had them make their own “workmanships” the first study then the next we beautified them each to our own tastes.  It was a little mess and a lot of fun.

Ingredients

  • Flour (3 parts)
  • Water (1 part)
  • Strips of paper (recycle!)
  • Balloon
  • Small cereal bowl to use as a stand
  • Elmers glue/modge podge or spray shellac

I was on a limited budget so instead of buying liquid starch (not even sure they have that here) I tried flour and water remembering that someone once told me that was the old school wallpaper glue.  It worked!  I LOVE crafts that you can make with stuff on hand!  And I especially love ones that you can use up stuff that would otherwise end up in a landfill somewhere.  I mixed the flour and water mixture by eye but while looking up a receipe for y’all I ran across another I want to try sometime.  Paper mache pulp from egg cartons for smaller more detailed items!  So cool!  I saved up all these egg carton flats to start fires this winter but never ended up buying wood due to finances and due to the fact that the winter was pretty mild (PRAISE THE LORD!)  So now I have all these egg cartons and was looking around for a craft for them.  Yippie!  I love the internet!  The girls at first were TOTALLY grossed out at the messiness but then they ended up liking it a lot.

Here are the finished products.

Some things I learned:

  • For the base I made a ring of twisted paper then put layers of paper mache over it to secure.
  • Do more than 2 layers letting them dry over night.  Makes them stronger.
  • If you are using regular printing paper let it soak for a minuet in the paste.  Thinner paper works better.
  • The paste really is like glue and is difficult to get out of carpet and clothes 😦  Use aprons and drop cloths!
  • Pay more attention to the edges or they end up thin
  • Paint a layer of elmers glue mixed with water or spray shellac to protect once it s finished.
  • When you pop the balloons the flour paste junk goes everywhere!  Like a party!  Whoop Whoop!

Helpful Links:

Published in: on March 25, 2010 at 9:23 pm  Leave a Comment  

Guitar Strings Jewlery

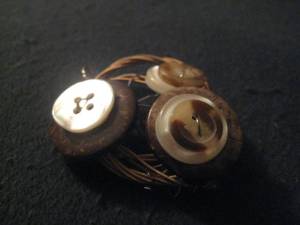
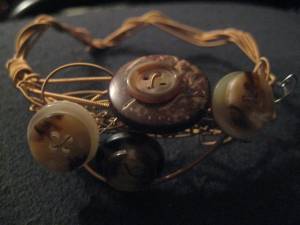
It always bothers me to throw out my guitar strings when changing them but I could never quite think of using them in any creative way until I stumbled upon some really cute jewelry listings on http://www.etsy.com.  So I decided to try some myself.  I have no idea how to write a tutorial for this so sorry about that.  Basically just use the thinner strings to secure the edges of the thicker strings once you have them in the form you want.  Gloves would be a good idea. I didn’t have any and ended up with pricked fingers.  I wanted to add more to the bracelet and the pendant so I used the thinner strings to wrap some buttons on top of the design. Make sure to bend the edges or they will scrape and poke you!  So if you play guitar but are not crafty feel free to send me your used strings :o)

Published in: on February 20, 2010 at 8:33 pm  Leave a Comment  

Homemade Christmas!

Merry Christmas to everyone!  From a land that doesn’t celebrate Christmas.  It is a great time to be explaining to  people why this holiday that we   Christians celebrate is so special. Though I miss seeing Christmas    decorations everywhere it is nice to not be overwhelmed by the mass commercialism of Christmas that you have in the states.  Just like you back home this season is very busy for us as well.  This week we are coordinating the distribution of 2,000 Christmas shoe boxes in 4 local elementary schools. Thank you to all of you who take part of this program states side.  These boxes are not just tokens of Christmas cheer but seeds of the gospel sown in every child who receives them.  Please pray for the distribution and that we will have an opportunity to share why we are handing these out…about The Gift-Jesus!

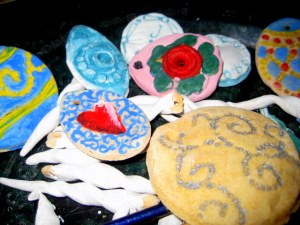
Christmas decoratons seem such a weird thing to me to buy when I have mostly made my own over the years.  That is half the fun right?  I bought a 1 euro tree for myself and my pastor bought a Christmas tree for the church and asked me to decorate it.  Hmmm no budget..paint? check?…flour? check..Salt? check..friends? check!

Recipe

  • 1 cup warm Water (or enough to make a non sticky dough)
  • 2 cups Flour
  • 1 cup Salt
  • roll out and cut or sculpt into desired shape then bake on a low temp in your oven till hard and dry.  I pressed patterns into mine before baking and loved the result!

Another good material is Cornstarch clay which is white and sparkely!  Woudl have made it but didnt have the cornstartch. See the recipe here http://www.aboutchristmascrafts.com/make_your_own_christmas_tree_decorations_with_baking_soda_cl.html

I recently bought a computer microphone-gotta keep in touch with the family cake home.  Is it just me or is there WAY too much plastic in teh packaging of electronic items. Plastic which by the way you are apt to sever a finger with if you are not careful.  This is not the kind of plastic that generally gets recycled so..ornaments!!!  I also used the plastic case of a knife I just bought and again…yes..NAIL POLISH!!!  I am running out of it by now 🙂  Again if painting on plastic you can also mix 2 parts acrylic paint with 1 part elmer s glue.  Or if you don’t want it to be that translucent just cover you painting with elmer s glue or modge podge to seal.


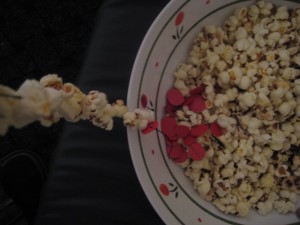
No cranberries here so used and extra piece of a friends wedding invite to cut berries for my popcorn garland.  Yes some are burned but it is because I am still figuring out my electric stove which temperature changes due to the current strength of electricity 🙂

Another great site for recycled decorations is here…

http://images.google.com/imgres?imgurl=http://farm4.static.flickr.com/3108/3096326049_a9a5ccc93d_b.jpg&imgrefurl=http://wildolive.blogspot.com/2008/12/recycled-christmas-tree.html&usg=__e0Ftb63F-jX6SjIGAnv_XNm_zh4=&h=1024&w=685&sz=261&hl=en&start=73&um=1&tbnid=9QGCppT3TsysnM:&tbnh=150&tbnw=100&prev=/images%3Fq%3Drecycled%2Bchristmas%2Bornaments%26ndsp%3D20%26hl%3Den%26sa%3DN%26start%3D60%26um%3D1

Gezuar Krishlindja!  Merry Christmas!

Jen

Published in: on December 17, 2009 at 11:24 am  Comments (2)  

Painting with Nail Polish

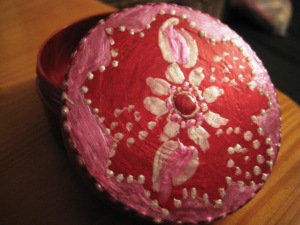
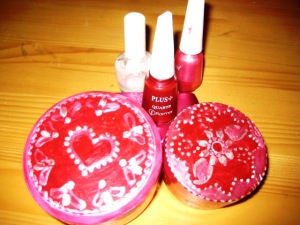
painted box

Materials needed:

  • used plastic containers
  • nail polish (pink,white & red)

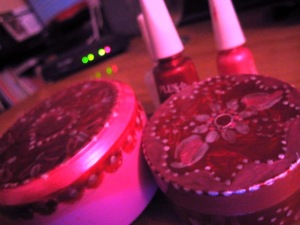
So I am sure you have a plastic container lying around somewhere that is about to end up in the trash right?  I had one.  It was a tan-ish color and used to hold face moisturizer.  I just couldn’t see tossing it because it was nice and sturdy.  I still haven’t figured out what to put in it but I had fun panting it anyway…So much fun in fact that I painted another container to match that had body lotion.  If you do this at home just make sure to paint with nail polish in a well ventilated area.  Nail polish is gre for those surfaces that wont take regular acrylic paints and is relatively cheap too.  This is a great craft to teach about recycling and can be made to match your home decor.  Craft away!

nail polish painted boxescrafts 025

Published in: on October 30, 2009 at 12:40 pm  Comments (4)